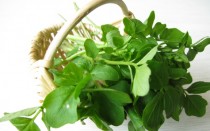
Organic Gardening 101 — How to Start an Organic Garden
Anthony Gucciardi
Activist Post
One great way to avoid the threat of genetically modified foods, pesticides, and toxic additives is to start your own organic garden.
While the garden can be as large or small as you’d like, the benefit of knowing exactly how your food was prepared, and therefore what is in it, is worth the time and effort.
As you will soon find, it is actually relatively simple to begin your first organic garden.
Organic Gardening Step 1: Planning Your Garden
Before you begin purchasing seeds and deciding on what you’d like to plant, you need to both establish goals for your garden as well as learn about how to effectively avoid low quality seeds and plants. Is your garden intended to feed you and your family for months at a time? If so, it still may be beneficial to start with a smaller garden at first to practice your technique. Regardless of the size, it is crucial that you are using the right seeds. It is preferable that you purchase high quality certified organic seeds that are not genetically modified.
A number of sites exist that provide 100% organic, non-genetically altered seeds for thousands of different plant varieties. You can even find non-GMO seed packs on Amazon for fair prices. The great news is that once you’ve purchased your initial batch of seeds, you can simply utilize the seeds from your new plants in the future to plant more. As for the soil, you may also have to acquire some organic soil if your backyard does not already contain a compost pile or other high-quality soil. If your backyard does contain high-quality soil or compost, you can also opt to use it inside for your window sill potting plants.
Now it is time to determine what you’d like to grow. For your initiation into organic gardening, try one of the 10 plants considered to be the easiest to grow. Whether on your window sill or out back, these 10 nutritious plants will most likely sprout right up without much of a challenge. These include:
- Tomatoes
- Pea shoots
- Beetroot
- Lettuce
- Mint
- Courgettes
- Dwarf French Beans
- Onions
- Strawberries
- Dwarf French Beans
 |
| Non GMO Heirloom Seed Bank |
Organic Gardening Step 2: Setting Your Garden
Whether it’s in your window sill in a few small- to large-sized pots or your back yard, it’s time to analyze a few key factors when it comes to placing your garden. Keeping your size goals in mind, it’s time to determine the best place for your new organic garden. If it’s an herb or vegetable garden you’ve got in mind, you’ll need a site that gets at least six hours of sun per day. It is also important to make sure that there is sufficient drainage for wherever you place the plant. If your prospective area receives a large quantity of rain that is not easily drained and rerouted, then that is less than optimal and you may want to consider changing the setting. Herbs and vegetables prefer well-drained soil. If it’s an ornamental bed, consider placing it where you can enjoy it from inside your house as well.
(adsbygoogle = window.adsbygoogle || ).push({});
Once you have picked a site, observe it for a day for two. Examine how many hours of sun it gets on a daily basis, and the intensity of the sunshine. You can even test out the soil you are using with 3 simple tests.
To determine the type of soil you are working with, take a handful of moist soil from your garden, and give it a firm squeeze. Then, open your hand. One of three things will happen:
- It will hold its shape, and when you gently poke it, it will crumble. This means you have optimal quality soil.
- It will hold its shape, and, when poked, the soil still sits stubbornly in your hand. This indicates that you have clay-based soil.
- It will fall apart as soon as you open your hand. This means you have sandy soil.
If the quality of your soil is poor, then you can either bring your gardening indoors or purchase some organic soil to augment your current soil.
Organic Gardening Step 3: Planting
Once you have your plants, dig a hole just as deep and at least twice as wide as the root ball of your plant. Place your plant in the prepared area, and backfill with the soil you just removed. Tamp it in, and make sure to water it thoroughly. A thoroughly watered root ball will help your plant adjust better to its new surroundings and help to avoid transplant shock.
Congratulations, you have completed your first course in organic gardening! More information, guides, and techniques will be released periodically to help you maintain your garden and utilize little-known tips to maximize production and quality without harsh chemicals.
Explore More:
- Cost of Organic Food Verses Conventional | Paying for Health
- Radioactive Strontium Detected at Fukushima Plant
- How to Know if Your Food is Conventional, Organic, or Genetically Modified
- Chart Reveals Organic Food Companies Often Owned by Mega Corporations
- Health Alert: 32% of Organic Produce Contains Rocket Fuel Chemical
Please visit Natural Society for more great health news and vaccine information.


